- After downloading the plug-in, unzip the downloaded content using an unzip utility other than provided natively in MS Windows OS. You would run into facing errors if you use the Windows native unzip utility. For more information read the following known issues:
- Place the unzipped content of the downloaded plug-in in the following location:
- Then, in VSTS go to Tools -> Options… -> Environment -> Add-in/Macros Security
- Click on ‘Add…’
- Select the folder and click on ‘OK’.
- Then go to ‘Tools’-> ‘Addin Manager’:
- Select the checkbox available under ‘Available Add-ins’ and ‘Startup’ and click on ‘OK’. Restart VSTS (Close and launch VSTS again).
- After successful installation, the following two menu items would be available under ‘Tools’:
- Now, go to ‘Tools’ -> ‘dynaTrace Configuration’ in VSTS:
- Now, open the VSTS Test project, change the dynaTrace Server to the IP address, where dynaTrace server is installed. Provide the dynaTrace Server port accordingly.
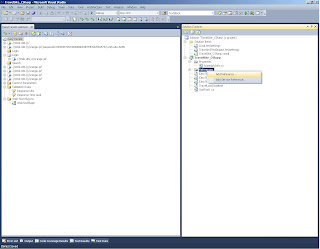
- In the ‘Solution Explorer’, right click on the References and ‘Add Reference…’:
- Browse and select the ‘dynaTrace.VSTS.WebTestPlug-in.dll’ from the unzipped plug-in folder:
- Click on ‘OK’. Then, the plug-in should be available under the ‘References’ as shown below:
- Save the project and right click on recorded script header and select ‘Add Web Test Plug-in…’:
- Select the plug-in and click on OK:
- Execute the web test and observe the pure path is being collected in the dynaTrace tab:
- If the Pure Paths are not getting displayed, check whether the dynaTrace License is activated.
- Make sure that the dynaTrace .Net agent is injected in the application server. If the application is running on the same machine as VSTS, then configure the ‘Launcher’ tab in the dynaTrace plug-in installed (Tools -> dynaTrace Configuration in VSTS) and launch the application with Tools -> dynaTrace Launcher available in VSTS.


